Home About Me Email me! Subscribe to our feed! crafts and cakes

Fingerprints on the Fridge


Featured on Bird Craft

Bird Crafts

Featured on Simply Sweet Home

Photobucket

Featured on OPT

oneprettything

Creative Itch

Photobucket

UBP 2010

Ultimate Blog Party 2010

Craft Map

Thursday, February 18, 2010

Good things to come.....

I have about 4 blog posts that I am working on - but, I've been too busy to get them up! We are leaving for vacation tomorrow so that has taken up much of my time.

As most of you may know I'm a cake decorator and I am currently working on the most important cake EVER right now. See, there is a little boy who is beating the odds and celebrating his 1st Birthday next weekend - guess what...

I GET TO MAKE THE CAKE!!! I'm so excited!! I cannot wait to make this cake for him and his family. It is going to be ONE BIG OLE CAKE!! I mean seriously HUGE!

Please take a minute to head on over to read about Jonah and about EB. Also, there is going to be an AWESOME auction coming up in honor of Jonah and all proceeds go to Debra.org to fund support and research for families effected by EB. Check out the Auction too - super cool stuff there!

AND! (I KNOW! it just keeps getting better) I get the chance to be a pattern tester for Whimsy Couture - so excited! So I went today and picked out some cute orange floral fabric for the jumper I'm going to test.

So - blog posts to look forward to soon -
1. How to organize your craft room!
2. Super awesome cake for Jonah
3. Whimsy Couture pattern tester
4. Helpful hint to make the perfect decorated cut-out cookies!

I really hope you are looking forward to these posts as much as I am looking forward to getting them posted!

Hey - did you hear - Samster's Mommy is preggers again!!! Congrats Nat and whole Samster family!

Saturday, February 13, 2010

Chocolate Covered Oreo Tutorial

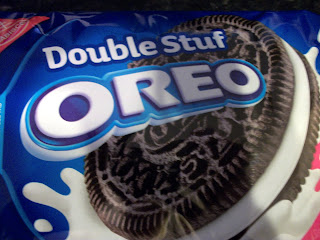
What can you do with.....


AND.....


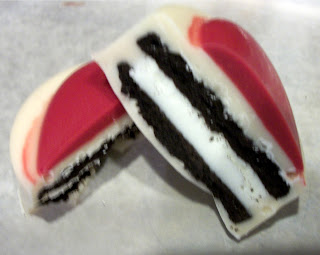
You can make THESE.....


YUMMYYYYYY!!!!!!

These are really pretty easy! First thing you need is a cookie mold. You can buy some at your local craft store (Michaels, JoAnns, or Hobby Lobby). They are made by Wilton and you can see some here. I prefer to use molds from a company called Spinning Leaf, I love their selection. Their molds are a little bit deeper allowing you to use Double Stufs and get a better cookie to chocolate ratio. In the Wilton molds you should use regular Oreos.

So - you will want to pick your colors of candy melts, which you can also get at your local craft store. For these I went with Pink and Red for the hearts and then light brown chocolate and white chocolate to cover the cookies.

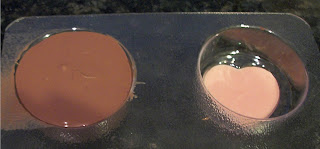
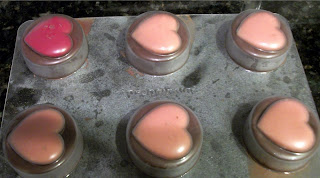
First, melt your colored chocolate to fill the decoration on the top. To fill small areas of decoration you can use a paint brush, but for this size decoration I used MacKenzie's old baby spoons. Make sure you don't overfill the decoration part - you don't want that color spilling over into the cookie section.


Next you will want to put them in the freezer to let the chocolate set for a few minutes. While they are in the freezer you can start to melt your main cookie color. Once the hearts are set take them out of the freezer and put a small amount of chocolate into the mold, not quite 1/2 full.


Next you will want to place your oreo into the chocolate.


Gently push down on your oreo while twisting slightly. This will allow the chocolate to get into the grooves beween the cookie and the filling and make sure that you don't have any cookie part showing through the chocolate.

Now fill the top of the mold. Try not to over fill and then gently tap out the air bubbles and ensure the whole cookie is covered. If you over fill the mold take a straight edge (icing spatula etc) and scrape off the excess back into the bowl of chocolate.


I usually do one cookie at a time to make sure that the chocolate doesn't set up as I'm filling - but this is what all the steps look like together:


Once all the molds are full place them back in the freezer for a few minutes.

Then simply turn your mold over and they should all just pop out. If you have any that stick gently press on the top of the cookie (in the heart).


And then you have BEAUTIFUL, YUMMY chocolate covered oreos! 6 at a time!


I made these for M's preschool teachers, so I went simple with packaging. It had nothing to do with the fact that I waited until the last minute and didn't really have any other packaging on hand - not at all, I intended to go for a minimalist look.

Who cares how they are packaged! Look how good they look:


And you will be a guaranteed ROCK STAR! And don't worry - if you mess them up - EAT THEM! YUM!

I always use the left over chocolate and the broken cookies too. Break the cookies up a little bit more and mix them in with the left over chocolate and then spread them out on a wax paper covered cookie sheet and pop in the freezer - instant oreo bark!

Now - go see if you have any oreos!

Saturday, February 6, 2010

Caitlyn's Baby Shower Presents

Today I went to a baby shower for my friend Mary who is having baby girl. I saw a dress on Etsy and I just fell in love with it - but of course I said "I can make that!" (which has gotten me into so much trouble over the years!)

So off I went to JoAnn's to buy some zebra print and hot pink fabric. The dress that I saw had shirring at the top and a super cute ruffle at the bottom.

It wasn't until after I finished the dress that I decided that I should start a craft blog and that I would offer some tutorials on things that I make. So for now - all you get are pics of the finished product. But, if you love it and want I can make another and put together a tutorial.


Isn't it ADORABLE!! (if I do say so myself!!)

I also made her a couple flower hair bows and one butterfly hair bow. I can't wait until the baby is here!!